

Adopt a Bug
Kids collect insects, keep them for a day or two, observe them, and release them.
Objectives
To appreciate insect characteristics and their roles in ecosystems through an up-close and thorough examination
Materials
- Transparent containers (2-liter bottles or other large containers)
- Scissors or knife
- An insect net (easily made with a wire hanger and pantyhose) and/or a small jar with lid
- Bug food
- Sponge (untreated and non-dyed)
- Habitat embellishments (small sticks, dirt or sand, small rocks, etc.)
- Diagram of Insect Anatomy
- Bugs!
Time
2-3 hours
Procedures
First, you might want to discuss with your kids the anatomy of insects, what makes an insect different from other animals, and why insects are beneficial in the environment. Explain that insects have three segments (head, thorax, and abdomen) and six legs, which makes them different from arachnids (spiders, scorpions, ticks, etc.) and other common bugs (millipedes, pill bugs). Most insects go through metamorphosis with four life stages. A butterfly is a common example: egg, caterpillar (larva), cocoon (pupa), and butterfly (adult).
To help kids learn what insects live in their community and observe them, ask them to create an artificial habitat for each collected bug. First, each student needs a bug jar: a two-liter bottle or other large, plastic container. Place about 1–3 centimeters of dirt or sand in the bottom of the container. Add about a tablespoon of water to moisten the dirt or sand. Then put several long sticks in the jar so the insect has an area to crawl up and down. Insert a small, damp piece of sponge or wadded-up paper so the insect can drink and the jar can maintain humidity. Finally, supervise kids as they puncture holes in the lid for air.
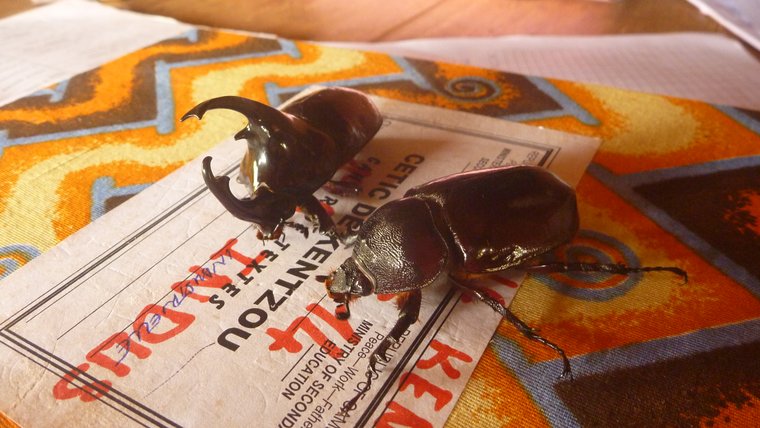
Go out and collect insects with the kids. Look under rocks, in trees, under fallen leaves; wave the net through areas of tall grass; or sneak up on bugs with small jars and catch them inside with the jar lids. Once all the kids have found insects and placed them in their insect jars, they can share observations about their bugs, explain what they will need to live, and bring their insects home for a day or two to observe them.
It is recommended that kids choose an herbivorous insect as they are the easiest to feed. Examples are grasshoppers, crickets, beetles, caterpillars, walking sticks, and fireflies. If kids are keeping such insects, they need to feed them with the exact species of plants on which they found the insects, because many species specialize in the plants they eat. Pollinating insects like bees and butterflies are OK too, but will need a good amount of flowers or ripe fruit. Carnivorous/predatory insects (ladybugs, praying mantises, etc.) need a constant supply of other insects to eat.
Explain that the kids must place their insects in a cool place without direct sunlight. The greenhouse effect of the transparent containers could fry the insects within hours. They should release the insects after a day or two in captivity, preferably back where they came from.
Variations:
Instead of everyone adopting their own bug, a demonstration bug habitat can be made for community environmental centers or classrooms.
Alternatively, to keep the activity simpler and shorter, give each kid a glass jar with a lid. Find a habitat that supports a good variety of insects. Give each kid 10 minutes to find an insect, sneak up on it, get it in his or her jar, and close it with the jar lid. Once everyone has a captured insect, sit everyone in a circle and pass the jars around, discussing the insects within. After everyone has seen all of the captured insects, release them where they came from. (Be careful when releasing stinging insects; they might be angry!)
Note:
Beforehand, find out if any kids are allergic to bee stings. If any of them are, or if you want to be sure that no kids get stung, choose an area to explore that does not have a lot of stinging insects.